6 Keepsake Ornament Ideas
(Posted on Thursday, December 6, 2018)
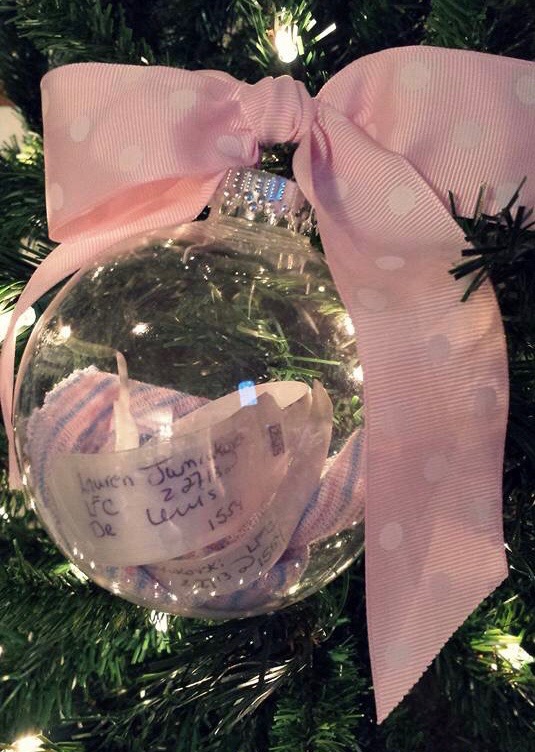
Baby’s Hospital Hat and Bracelet Ornament
These are our favorite ornaments. What a great way to save the hospital baby hat and hospital bracelets. Every year I decorate the tree I am reminded of the most special days of my life, the births of my three babies. To make this ornament, simply place the baby hospital hat and mom and baby’s hospital bracelets into a clear ornament. We chose plastic, so we didn’t have to worry about it breaking. Here is a clear plastic ornament which is four inches across. In this ornament, the opening is in the top, so we had to roll the items up tight to stuff them in. You may prefer an ornament which opens at the center such as this one. This option is a little smaller at about three inches across. To finish it off, we added our favorite ribbon to the top.Snowmen Ornament

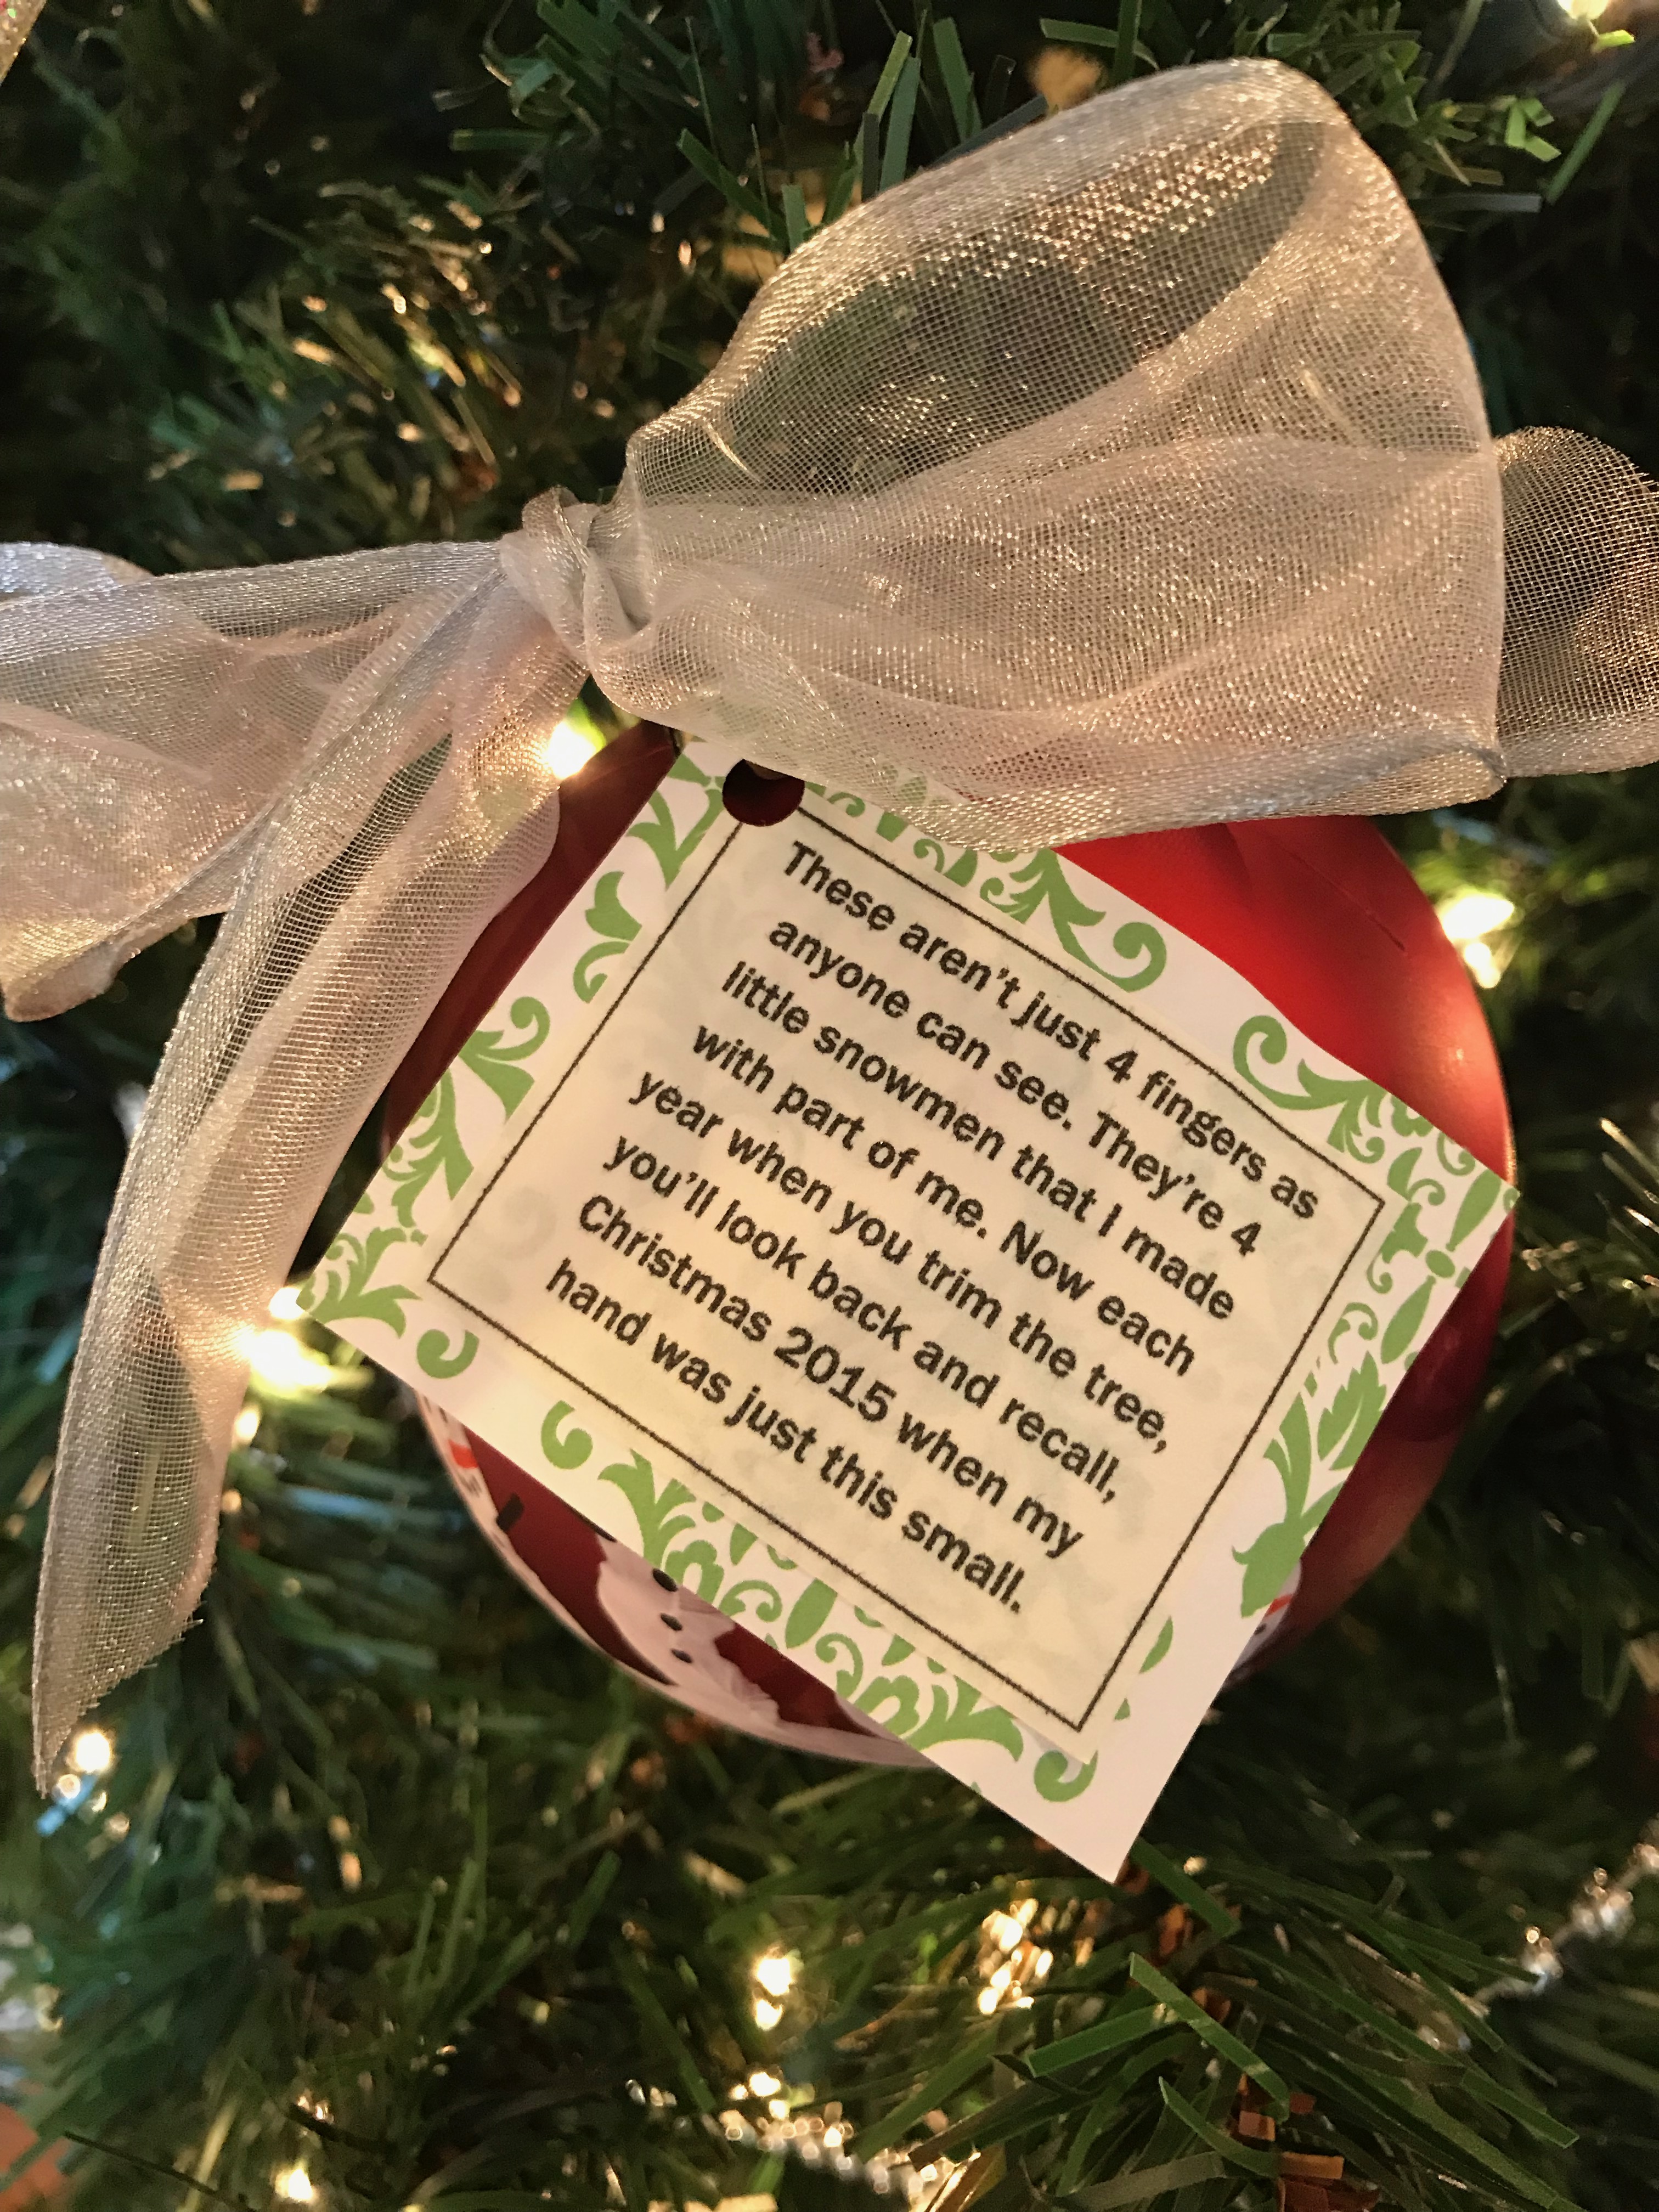 For this craft, we bought a plain red ornament. I painted my daughter’s hand with non-toxic white paint (we used Crayola Washable Paint) and had her grab the bottom of the ornament like she was grabbing a ball. Each of the snowmen are her little fingers. We could not get her thumb to look like a snowman, so we kind of blotted it into the bottom a little to make it look like snow. I just used her hand to blot, but you could use a sponge.
We used sharpie markers to make the snowmen features and also to write the date and child’s name on the bottom.
Then, we printed the following saying to tie onto the top:
“These aren’t just 4 fingers as anyone can see. They’re 4 little snowmen that I made with part of me. Now each year when you trim the tree, you’ll look back and recall, Christmas 2018 when my hand was just this small.”
Here is a link to the article we used for instructions: littybitfunky.com
For this craft, we bought a plain red ornament. I painted my daughter’s hand with non-toxic white paint (we used Crayola Washable Paint) and had her grab the bottom of the ornament like she was grabbing a ball. Each of the snowmen are her little fingers. We could not get her thumb to look like a snowman, so we kind of blotted it into the bottom a little to make it look like snow. I just used her hand to blot, but you could use a sponge.
We used sharpie markers to make the snowmen features and also to write the date and child’s name on the bottom.
Then, we printed the following saying to tie onto the top:
“These aren’t just 4 fingers as anyone can see. They’re 4 little snowmen that I made with part of me. Now each year when you trim the tree, you’ll look back and recall, Christmas 2018 when my hand was just this small.”
Here is a link to the article we used for instructions: littybitfunky.com
Wedding Invitation Ornament
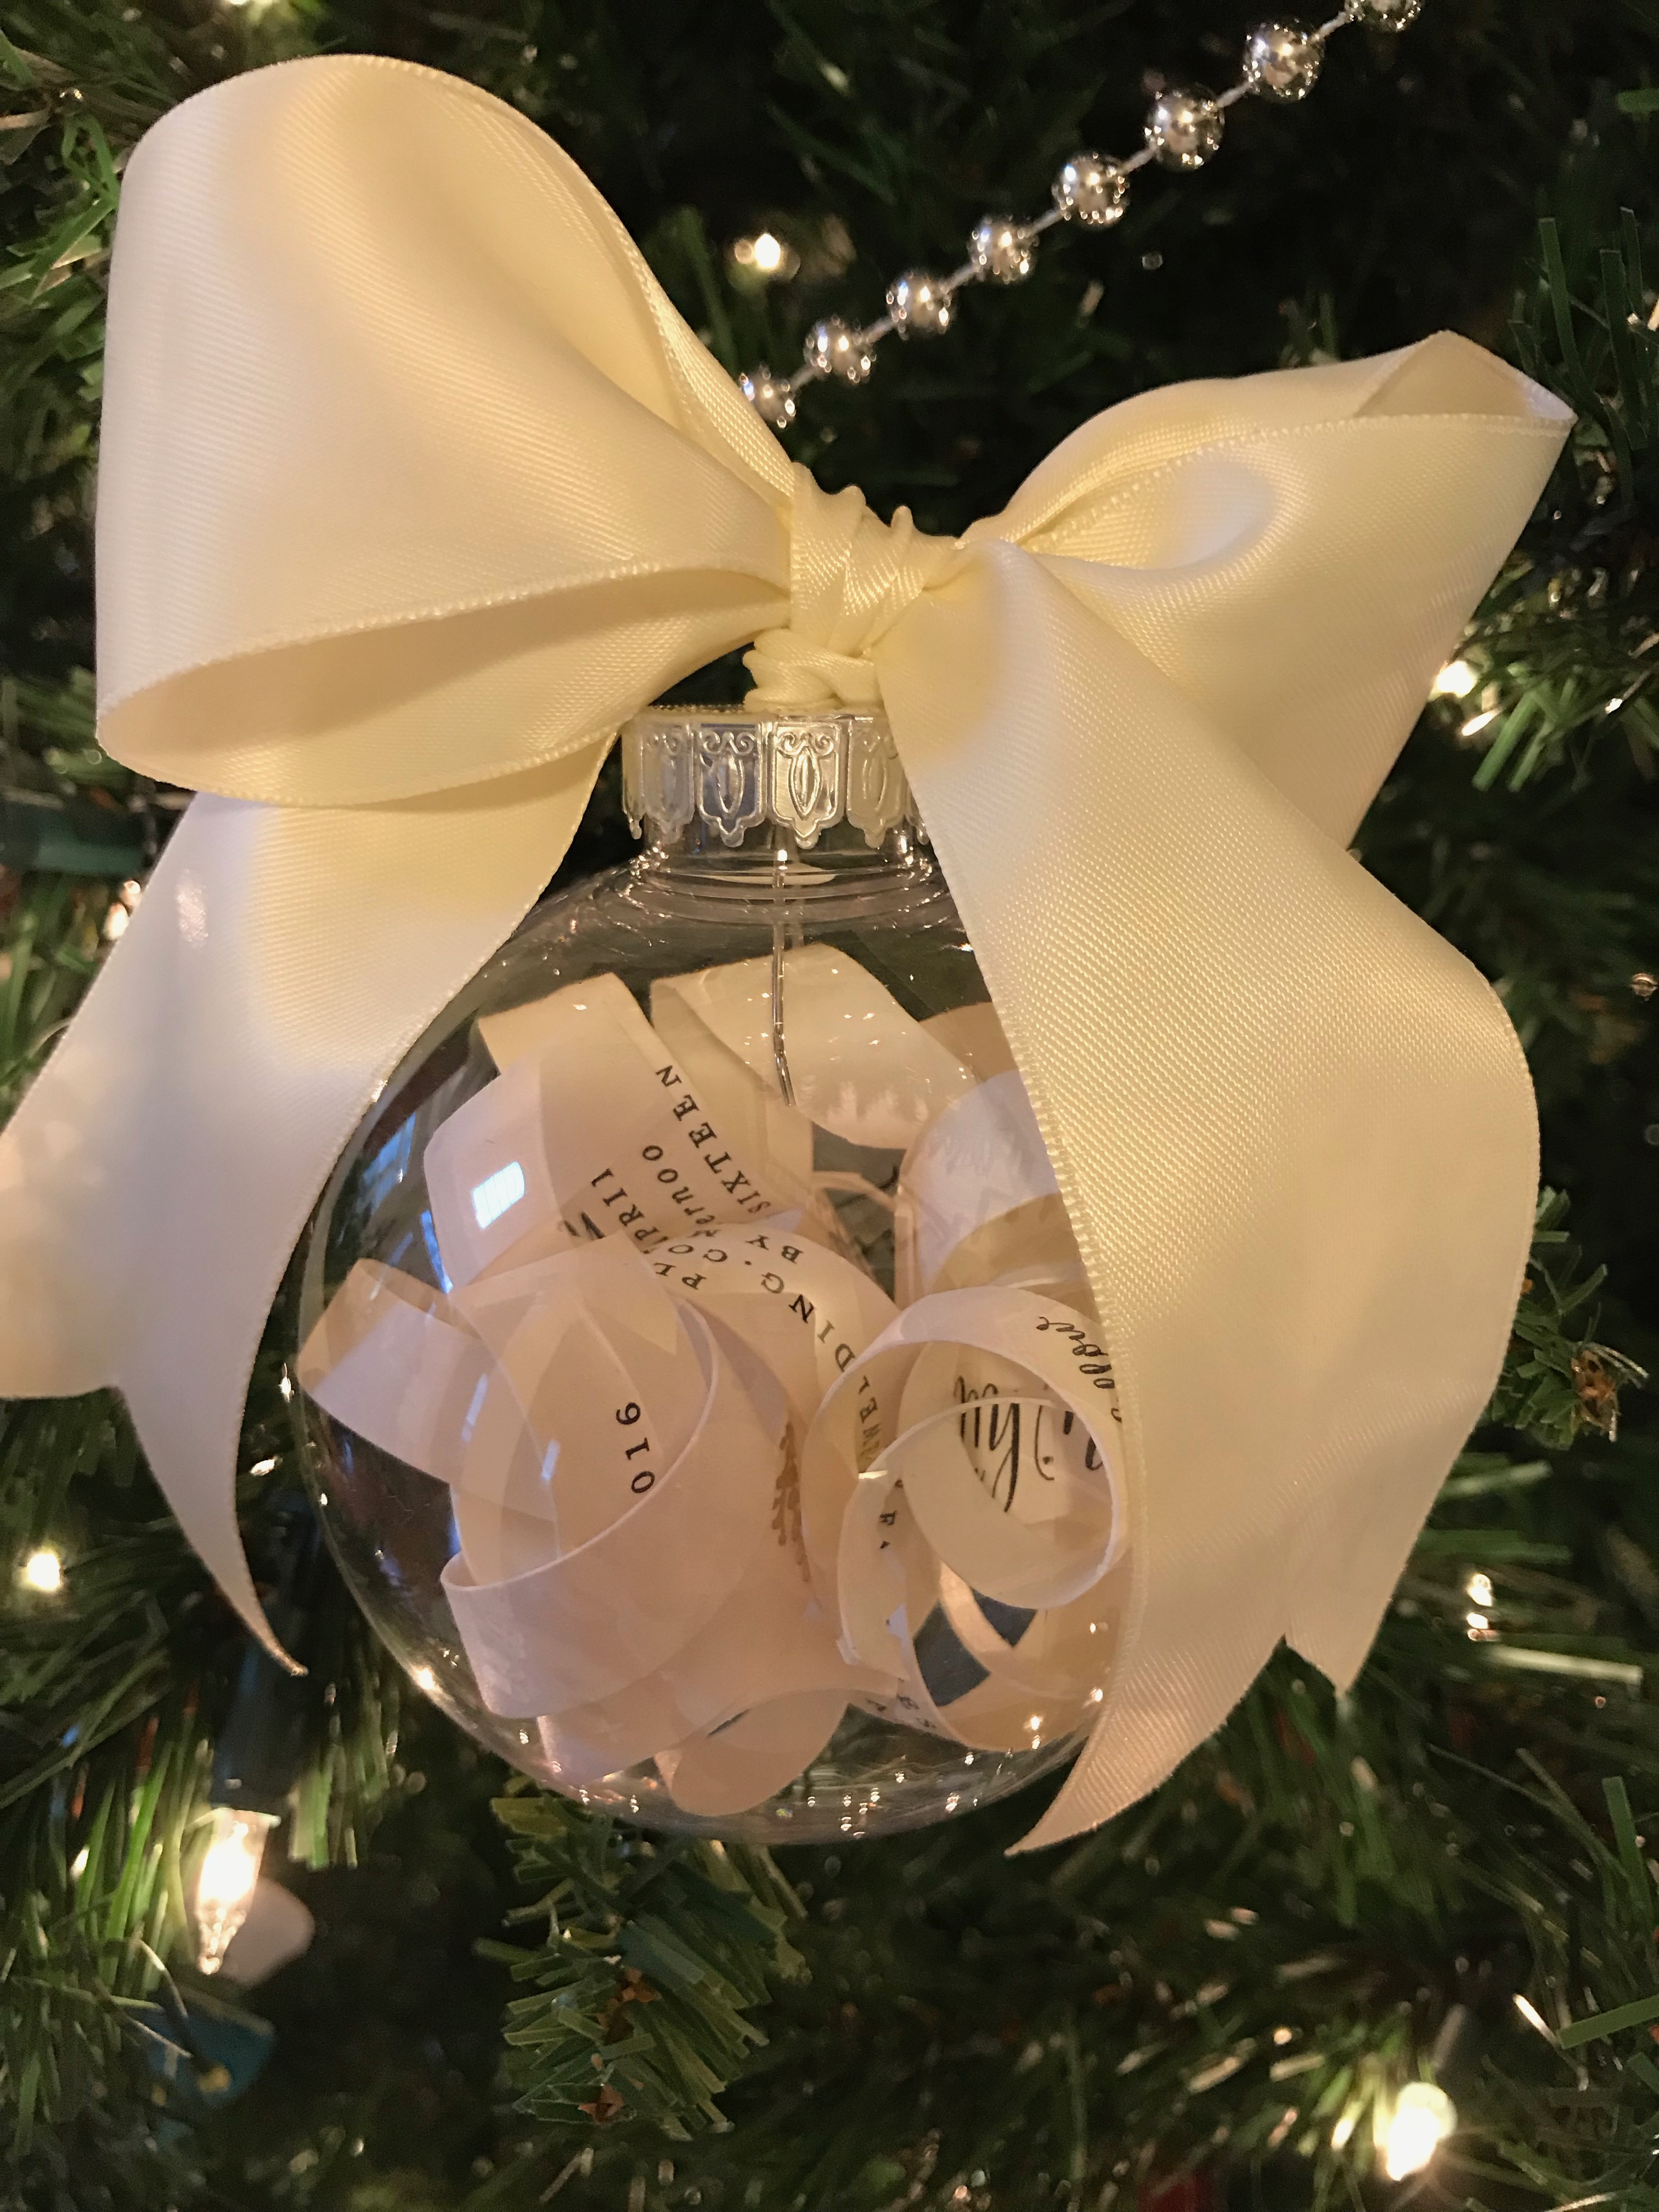 This ornament was inspired by a gift from a friend on the Christmas following our wedding. We cherish this ornament and have since started making them for friends and family. I prefer using a plastic ornament which does not open at the center, such as these. This way, it won’t break open.
- Cut the invitation up into long strips. I usually throw out the solid parts and keep any sections which include words or decorations.
- Wrap the long pieces around a pencil tightly, so they form a spiral. I try to wrap it moving down the pencil a bit rather than overlapping it in one single spot. When you let go, they should keep the spiral shape you see in the photo above.
- Slide each spiral into the ornament and shake it around.
- Add your favorite bow to the top.
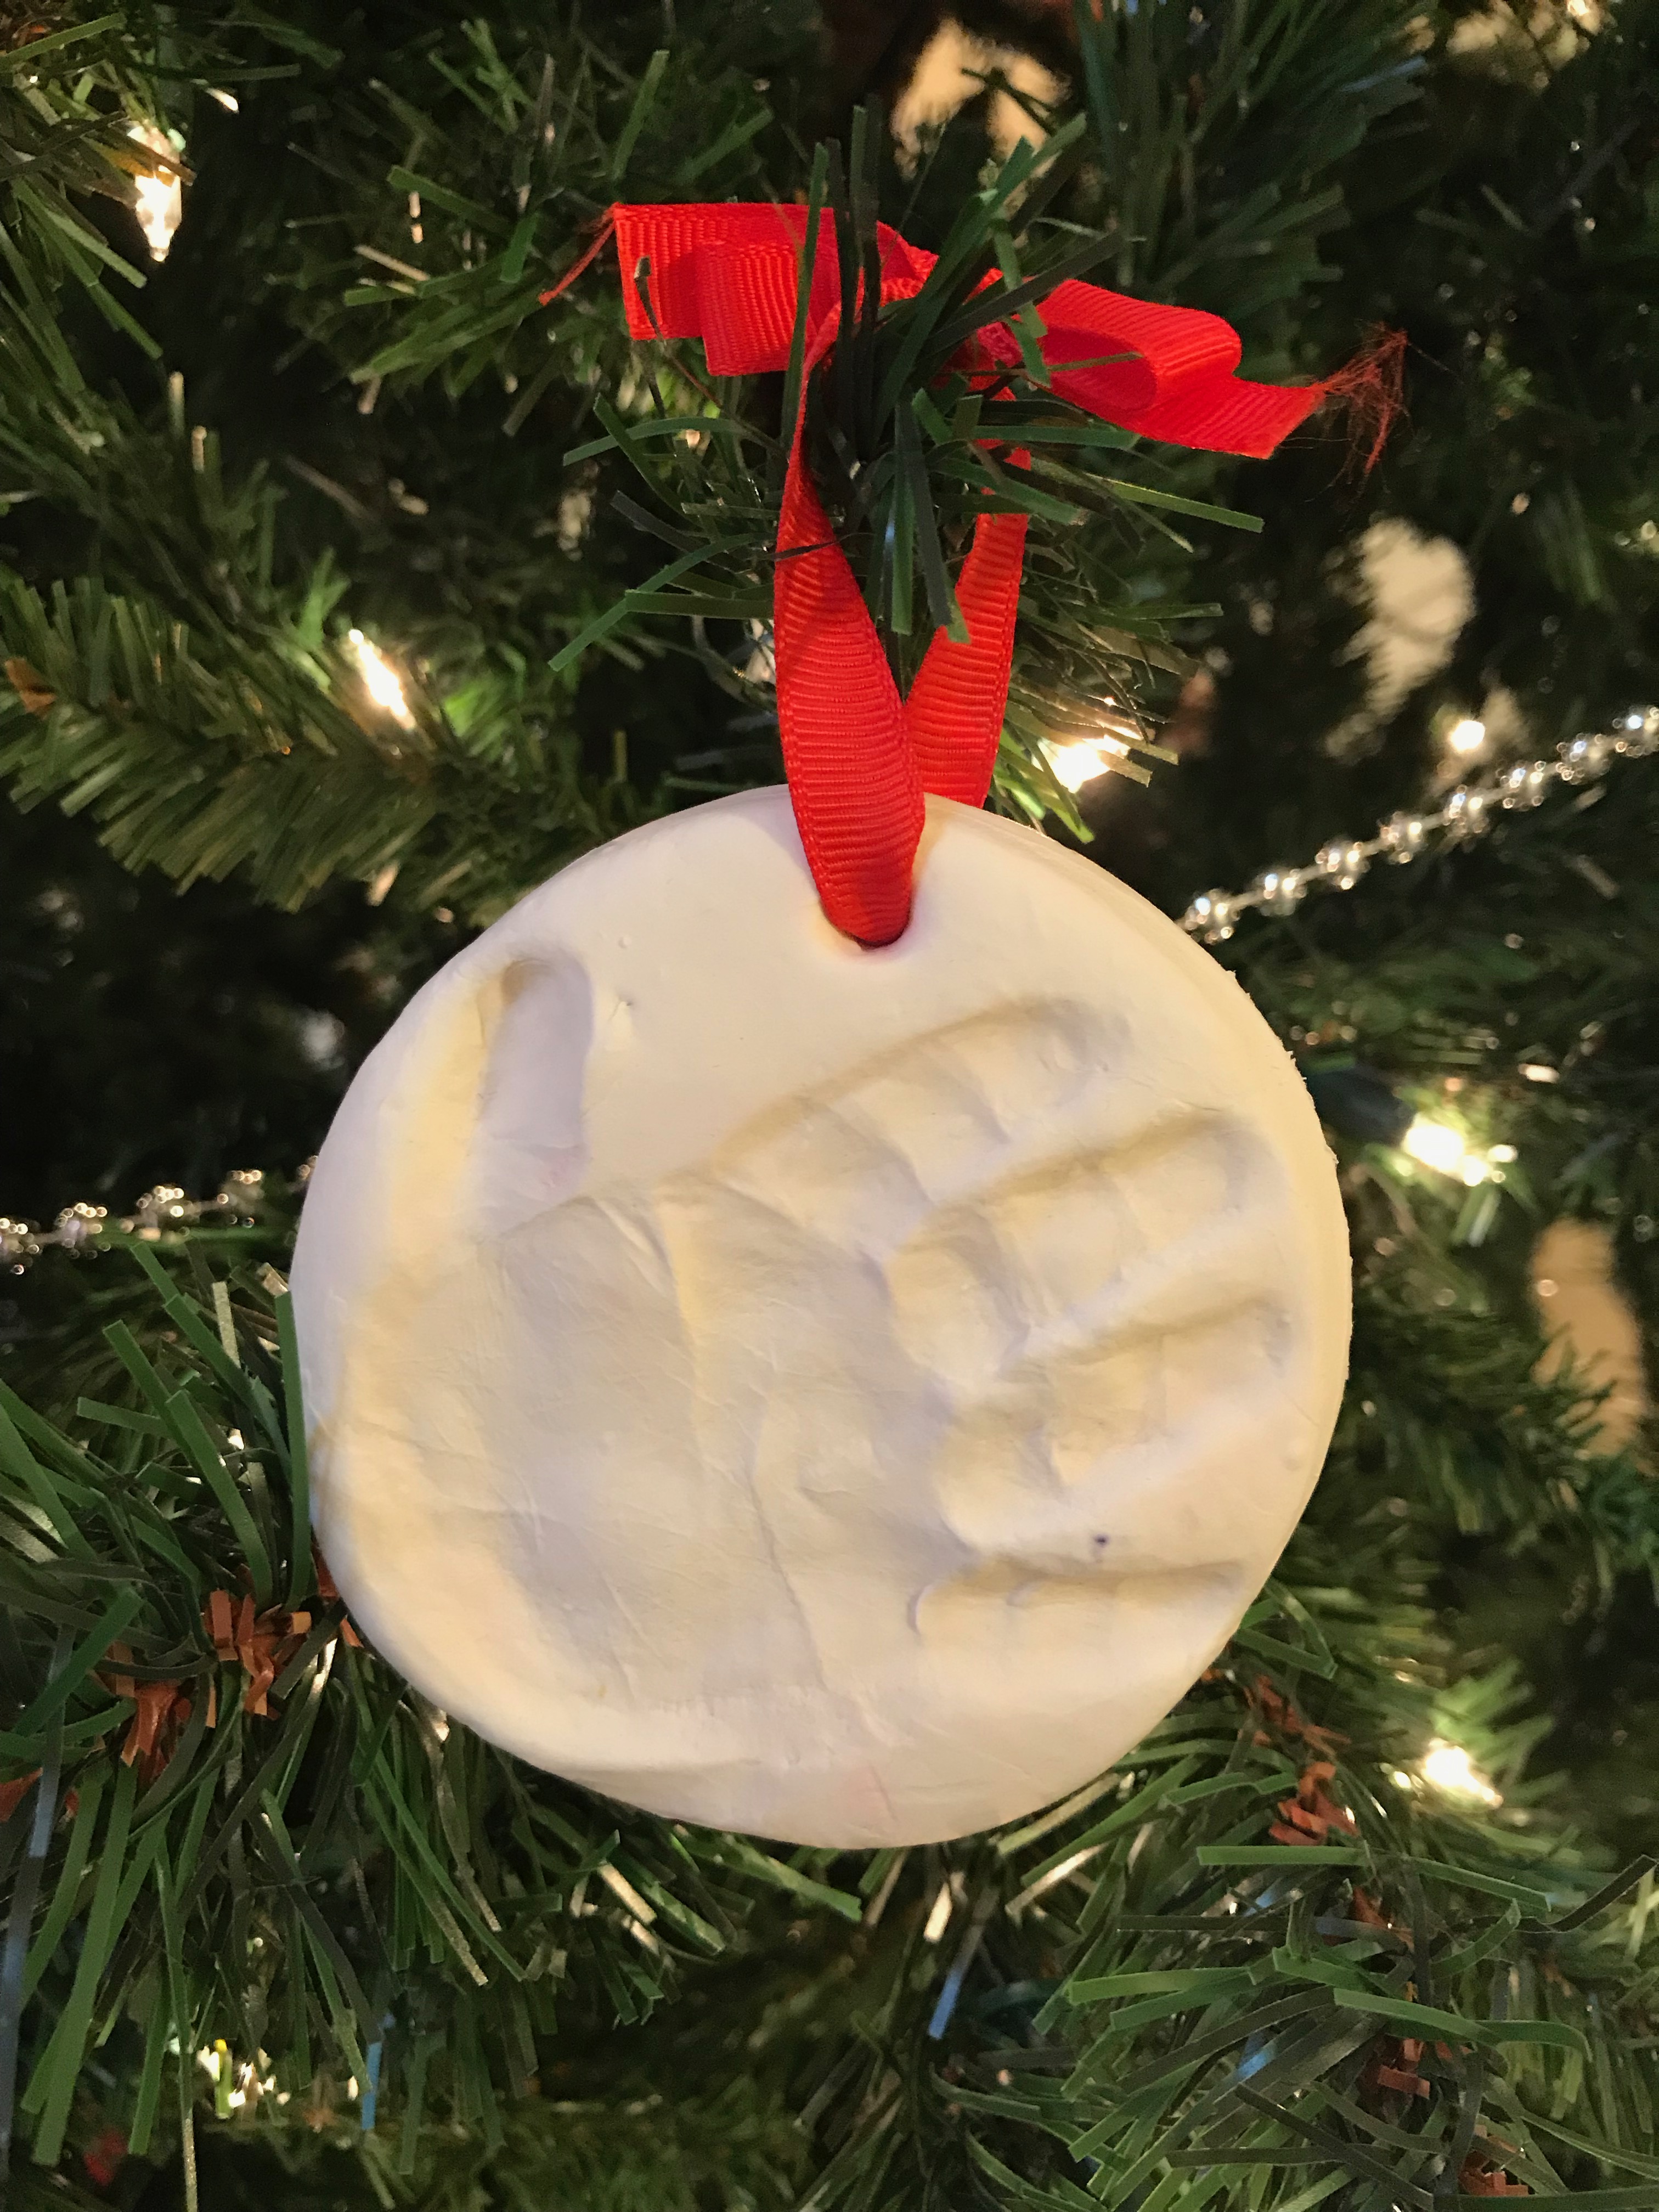
Salt Dough Ornaments
 Salt dough ornaments are so fun to make. The kids love it, because they can play with the dough just like play dough.
First, make your salt dough. Mix:
2 cups flour
1 cup salt
1 cup water
Once you make your creations, poke a hole at the top with a straw for hanging on the tree. Then, bake at 200 degrees for 3 hours. You want to be sure the ornaments are dried all the way through. If they are still soft on the back, you may want to flip them over for a bit longer (once the top is set).
Next, you will paint your objects. I like to use acrylic paint.
Last, spray your ornaments with an acrylic sealer to help them last.
Here are instructions for a few of my favorite designs:
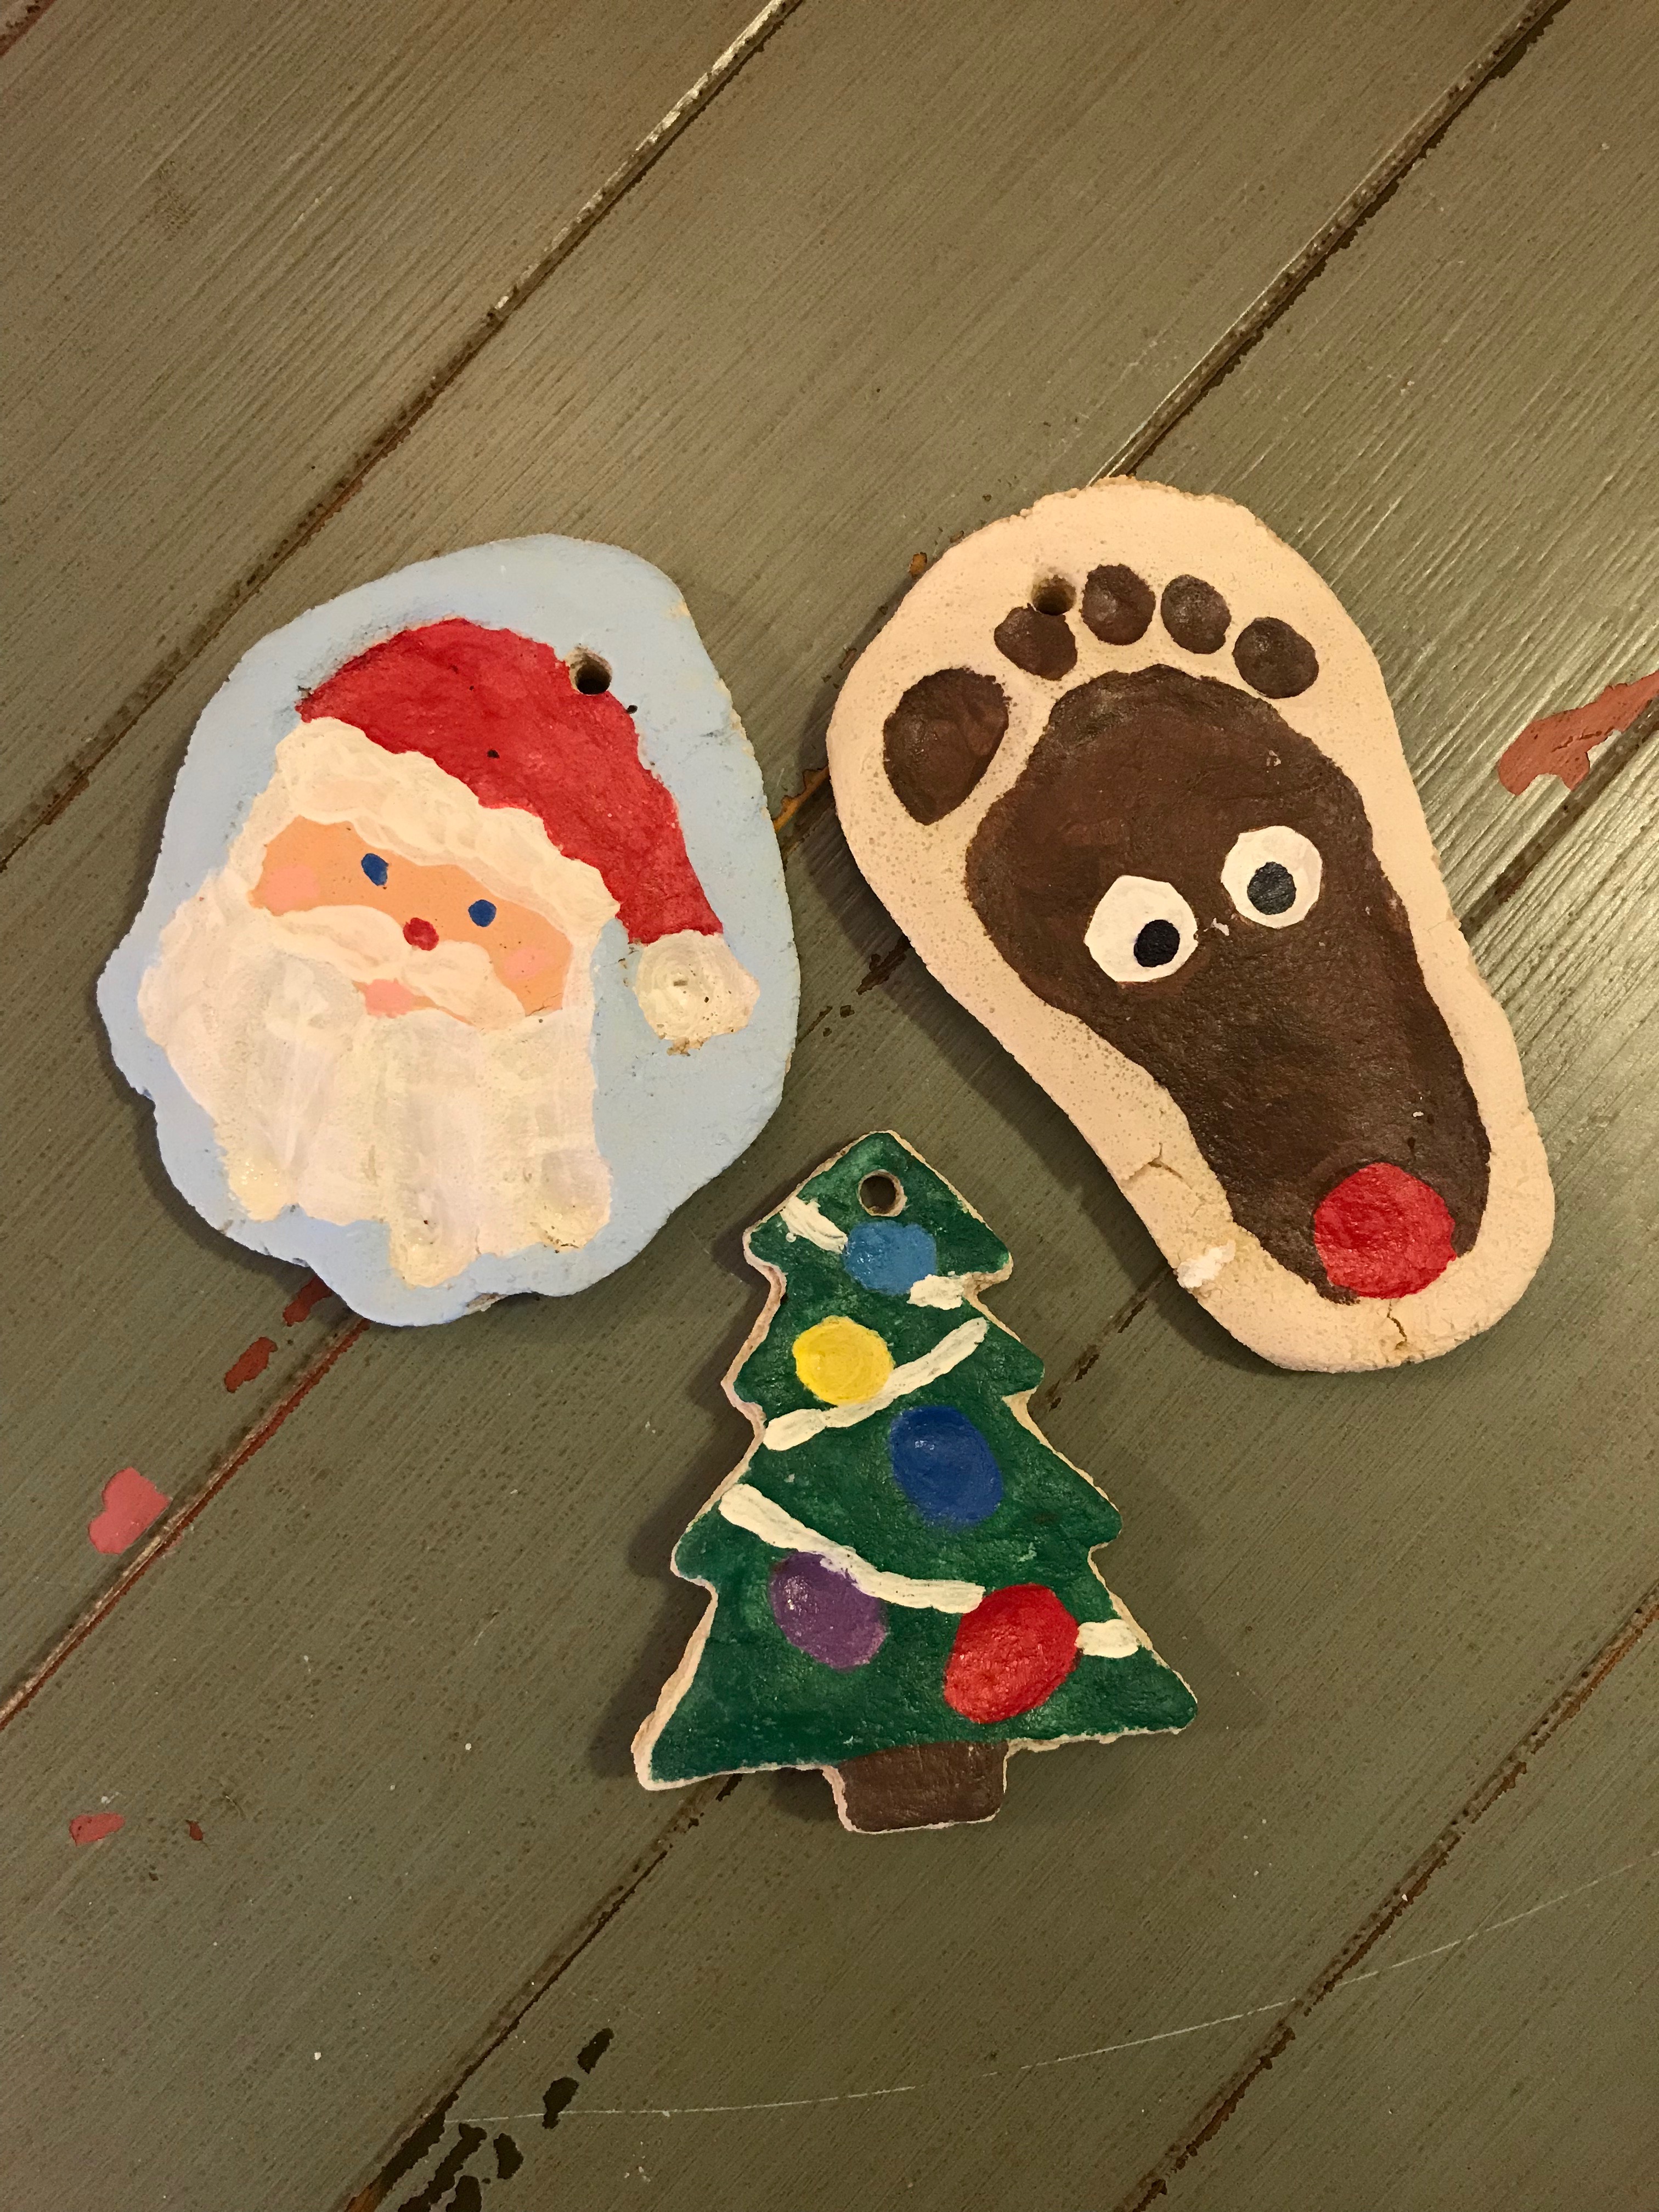
To Make Santa:
You will use an upside down handprint. Have your child push their hand onto the dough. Trim the dough around the hand shape leaving enough room to poke a hole with a straw. The hole will go at the base of the handprint.
The thumb becomes the Santa hat. The fingers become the beard.
To Make a Reindeer:
Have your child push their foot into the dough. Tim the excess and poke a hole about the toe area. Paint the whole foot brown, except for the eyes in the center and the red nose at the bottom.
To Make a Fingerprint Christmas Tree:
Cut out a Christmas tree shape, or use a cookie cutter. Poke a hole in the top. Have your child make fingerprints throughout the tree. The finger prints will become the ornaments. Paint the “ornaments” so they stand out.
My inspiration for these designs: Iheartartsandcrafts.com
Salt dough ornaments are so fun to make. The kids love it, because they can play with the dough just like play dough.
First, make your salt dough. Mix:
2 cups flour
1 cup salt
1 cup water
Once you make your creations, poke a hole at the top with a straw for hanging on the tree. Then, bake at 200 degrees for 3 hours. You want to be sure the ornaments are dried all the way through. If they are still soft on the back, you may want to flip them over for a bit longer (once the top is set).
Next, you will paint your objects. I like to use acrylic paint.
Last, spray your ornaments with an acrylic sealer to help them last.
Here are instructions for a few of my favorite designs:
To Make Santa:
You will use an upside down handprint. Have your child push their hand onto the dough. Trim the dough around the hand shape leaving enough room to poke a hole with a straw. The hole will go at the base of the handprint.
The thumb becomes the Santa hat. The fingers become the beard.
To Make a Reindeer:
Have your child push their foot into the dough. Tim the excess and poke a hole about the toe area. Paint the whole foot brown, except for the eyes in the center and the red nose at the bottom.
To Make a Fingerprint Christmas Tree:
Cut out a Christmas tree shape, or use a cookie cutter. Poke a hole in the top. Have your child make fingerprints throughout the tree. The finger prints will become the ornaments. Paint the “ornaments” so they stand out.
My inspiration for these designs: Iheartartsandcrafts.com